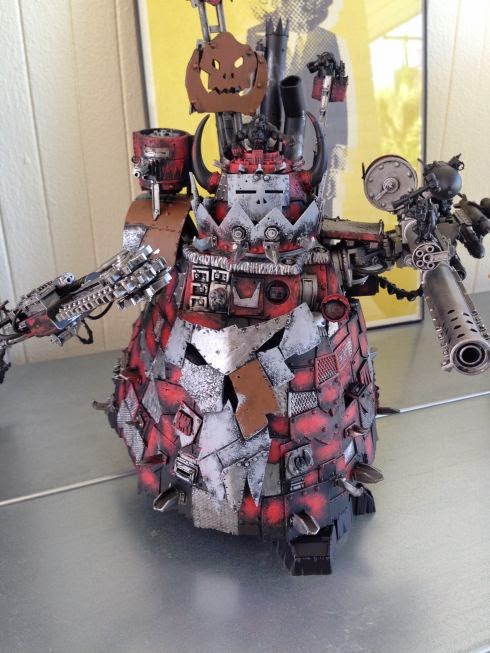
Time for a Stompa update! When last I posted I'd put down all the basic colors, but felt the red was too blotchy and didn't look realistic. The core issue I had was that when paint fades and peels away it tends to do so more from the top down, where I had the paint fading to the center of each panel.
These next couple of pics show where I went with the red next. I used my brightest red (Khador Red) to go back over the panels and fill them in. Since I was going for an uneven appearance I did most of this through drybrushing with a fairly wet brush. I concentrated on the lower parts of panels out to the edges, and I'm much happier with the results. I also added more red to the arms where they were previously completely metallic, focusing on the rokkits and chainweapon.


With the red in place I was ready to start with washes. The first round of washes focused completely on the silver parts of the model. My Ork vehicles get about five washes to make them look sufficiently dirty. Here is a shot with the first two washes, which are two layers of Nuln Oil. Between this and the last shot I also painted all the brass elements with Vallejo Brassy Brass and gave them one wash in Nuln Oil.

In these next shots all the washes are almost complete. After the Nuln Oil the silver parts got washes made with Scorched Brown (or Rhinox Hide), Mournfang Brown, and Skrag Brown. I made washes with these using Lahmian (sp?) medium. The brass got a second wash of Agrax Earthshade, and the mustard colors got a wash of Seraphim Sepia followed by Reikland Fleshshade.

This shot really shows off just how dirty all these washes make the silver. I like my Ork metal to look really beat up and old, and this does the job. You'll also notice some pooling of some of the washes, that sometimes can be unattractive. This is intentional, dirt does tend to pool. Regardless, the next drybrushing stage really cleans the worst of it up. Also note, the rokkits and chainweapon I treated as 'newer' metal. They only got one Nuln Oil and one Agrax Earthshade wash to intentionally make them stand out slightly from other parts of the model.

Below is a better shot of some of the white areas. They are not done. They've been given several very light layers of XV-88 (the new Snakebite Leather IMO). The effect is good, but not quite turning out exactly as I want it.

Here we have the washes for the white completed. I was following suggestions from the Forgeworld Model Masterclass books that stated similar washes were done with Snakebite Leather, but I could not reproduce their effects with that color alone.

I needed to do a second wash of Reikland Fleshshade to give the center of the streaks the dark effect that, to me, makes them look more shaded and convincing. Second wash is a little inaccurate, as this effect was done slowly, with several layers of XV-88 and Reikland washes applied lightly. White can be unforgiving, so I treated this part very carefully. I'm very happy with how they turned out.

In this shot you can see a panel that I added rust effects to. It's on the left towards the vertical center. The effect was done by leaving a few silver panels with only one wash of Nuln Oil, then giving them a wash of Typhus Corrosion followed by Ryza Rust, just as GW recommends. The Ryza Rust was drybrushed, follwed by a bit of stippling for the really bright spots. I have 3-4 panels throughout the model with this effect.

And, last thing for this update are the smoke stacks. These were an experiment that I am quite happy with. I did a Ryza Rust drybrush on the rust spots over the black base coat. Then I covered the entire smoke stacks with Typhus Corrosion. I loved the texture and way this toned down the rust, but it made the stacks too grey, so after another Ryza Rust drybrush/stippling to pull the rust back up I washed the entire stacks in Nuln Oil avoiding the rust spots. I'm not sure you can see it in this picture, but the result is a gritty texture over the stacks that I think looks really cool. (Typhus Corrosion is a textured paint, with bits of sand-like material in it)

Next up: Silver and Brass get finishing drybrushes and the red gets cleaned up and blended with the other elements. Then it's on to the details!