I realize that my third Stompa update never showed up. That's mainly because I got tired and decided to take a break on it. I'll return to it at a later date. For now I've been working on other elements of my Ork army, mainly a squad of Loota Boyz.
But that's not what this post is about! In this post I'm going to document the experiments I've been doing lately on washes and inks. Washes are one of the first things new painters discover to take their models from meh to cool. Even one coat of color with a wash can look nice on the table, but washes are great tools no matter what level of painting you're at.
I find most people have strong preferences when it comes to washes, usually very inconsistent from person to person. For me, I really miss my old school Citadel Black and Brown inks, which were later "replaced" with Badab Black and Devlan Mud washes (those replaced by Nuln Oil and Agrax Earthshade washes). I use the quotes because while Badab and Devlan are brilliant washes, they do not perform the same as the old inks in many ways. I view them as a new tool, better for many things, but I miss my inks.
To sum up the differences: the washes have a matte finish, and tend to coat evenly. They are very easy to use even straight out of the bottle, and generally don't pool or gather in unsightly ways like the old inks. This makes them great for cloth, skin, and solid colors (like painted armor). However, I don't like the effect on metallic paints. The finish steals away the shine of the metals making them look like flat paint, and the even coating doesn't provide the hard outlining that I feel can make metal pop.
The old inks had more of a gloss finish, and would settle into a very dark tone in the recesses, creating stronger outlining. They pooled, couldn't be used straight out of the bottle, and needed a matte varnish on non-metal elements (clothes shouldn't generally shine), but they made metal look great.
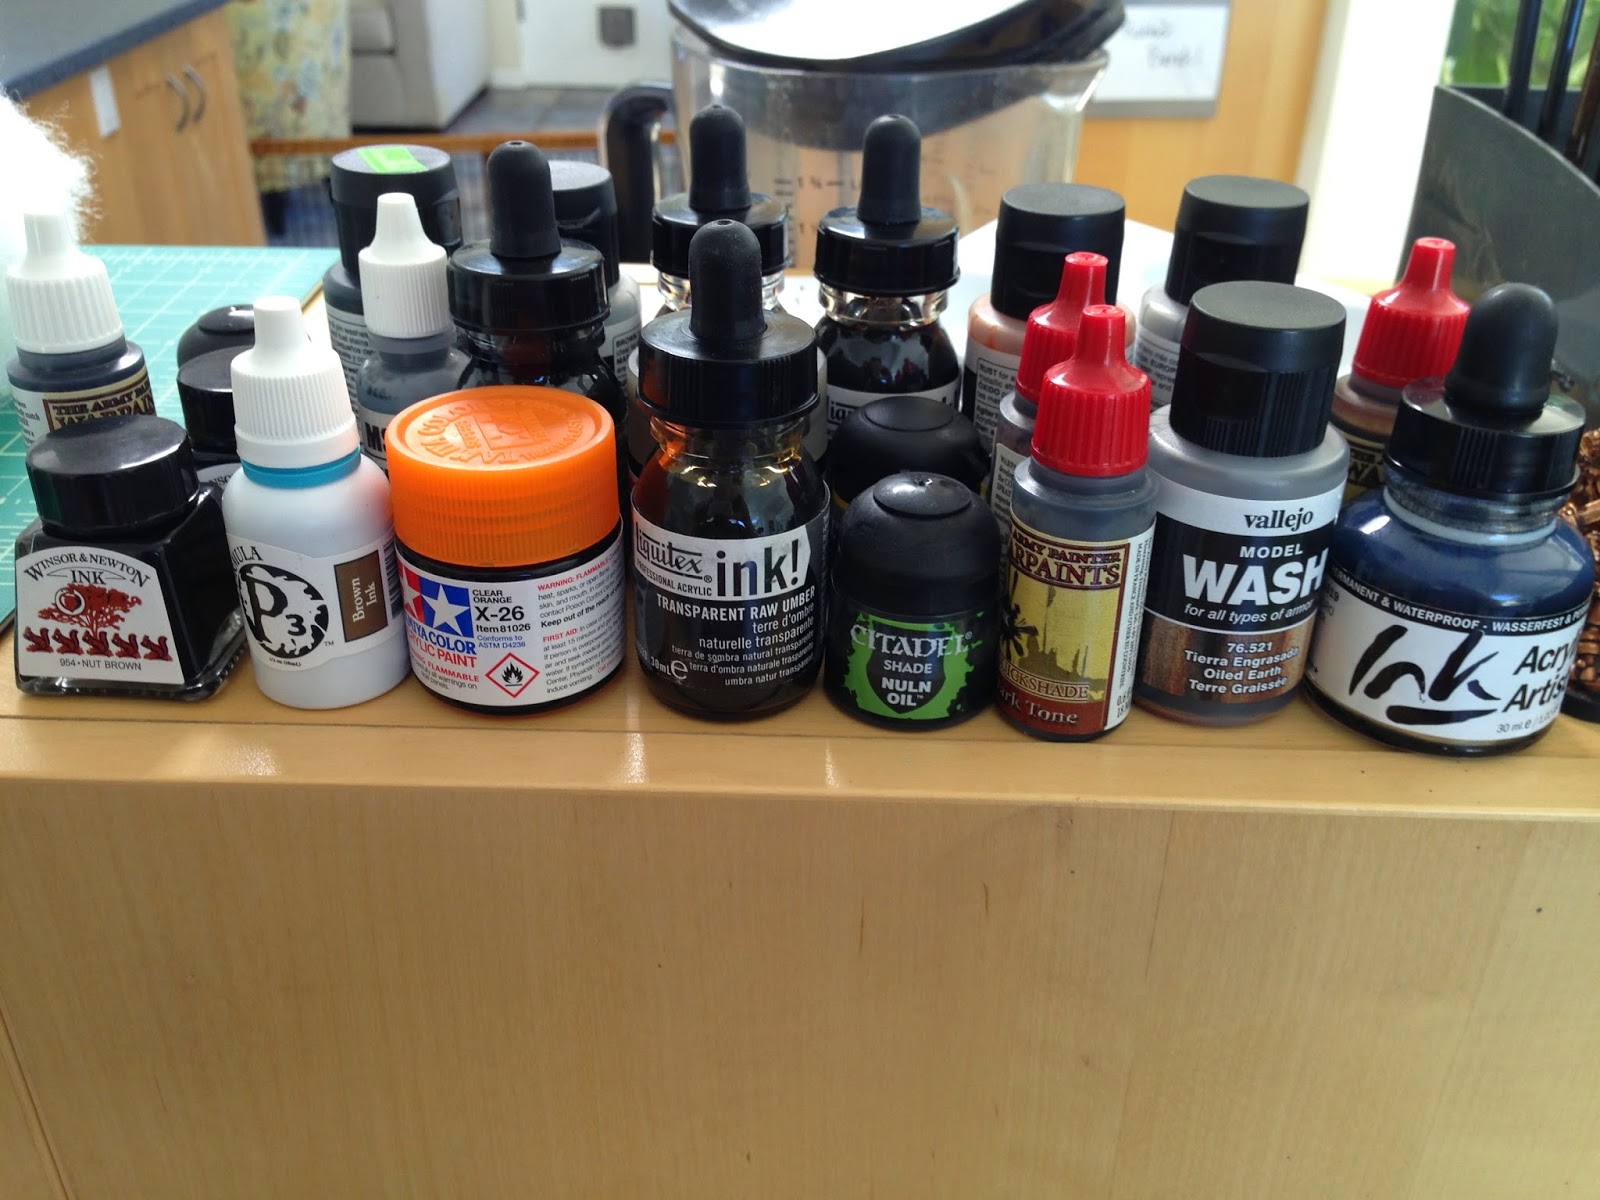
I recently ran out of my last bit of old Brown Ink, and decided to hunt for a replacement for both it and my Black Ink (which is, admittedly, easier to replace). Here are my results:
Brown Inks
Typically I use brown colors to shade gold, brass, bronze, and copper metals (I sometimes use a combo of black, brown, and more reddish inks, but this post isn't about that). For the base here I used Vallejo Bright Bronze, which is my base color for most gold effects I do. Note that inks pretty much always need to be diluted as they tend to be darker than most washes.
First up is P3 Formula Brown Ink, which is used on the lower half of this model. The effect here is somewhere between the Citadel Washes and Inks. Not a bad effect, and the metal stays shiny, but the color is 'very' red, much more so than I want in a brown ink. Ultimately this isn't what I'm looking for.

Winsor and Newton Inks can be found in most good sized professional art supply stores. I've actually used them before, and I like the black and brown effects they provide (I'd avoid using them for brighter colors, as I've had problems with them bleeding through paint layers). The lower half of this model is a great example of what an ink can do for metal paints. Strong outlines, good shading, but the metal still shines. I like this one a lot, but the effect is a bit more subtle in person than I think this photo lets on.
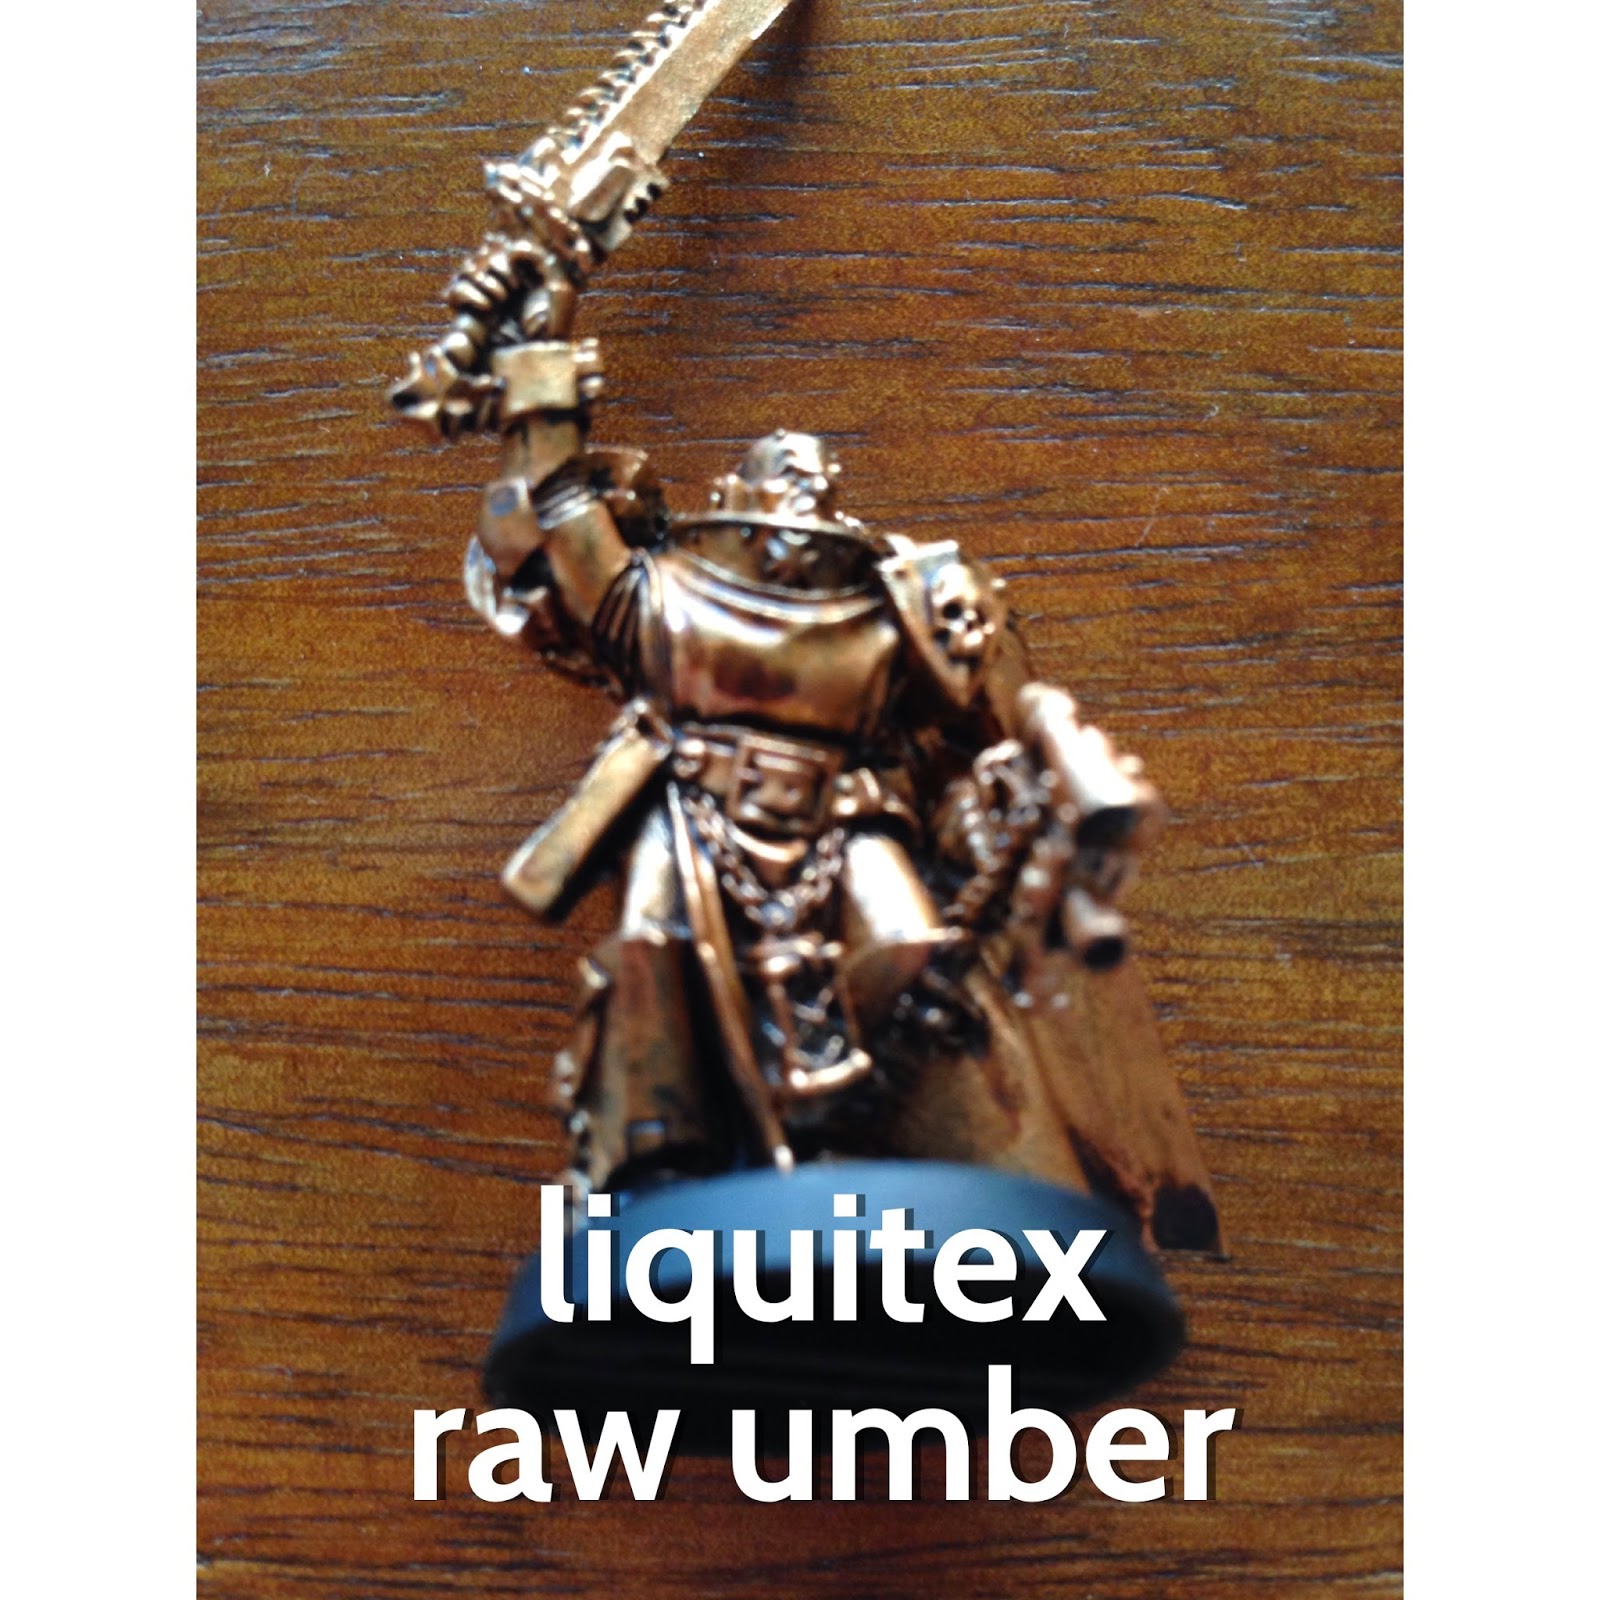
Most of the body of this model is shaded with Liquitex Raw Umber ink, another art store ink. I didn't like the black Liquitex ink (not shown below because it looked bad), so I didn't expect to like this one either. I was pleasantly surprised! This ink soaked into the recesses and created very strong outlines and has a nice deep brown tone. You can see the pooling on the chest which is a common problem with inks, but I'm OK with fixing that for the overall effect. Definitely my favorite so far.

Oh Liquitex, where have you been all my life! This is it, this is the effect I was looking for. Notice how every part of the metal seems to shine regardless of shading, and how sharp the lines are, but the top most notes of the metal color are almost unchanged. This is what a good ink does for the metals that I love. This color is similar in effect to the Raw Umber, but has a bit more red in it (the 'burnt' part I assume). I prefer this, personally since I tend to have more 'brassy' gold, but I'd use both. Note the pooling on the sword hand. This happens with this effect, and so you need to be prepared to clean it up with the original color.

Similar to the other Liquitex, but a much lighter color. Likely good as an additional shade, but I'd be unlikely to use it on its own.
Black Inks
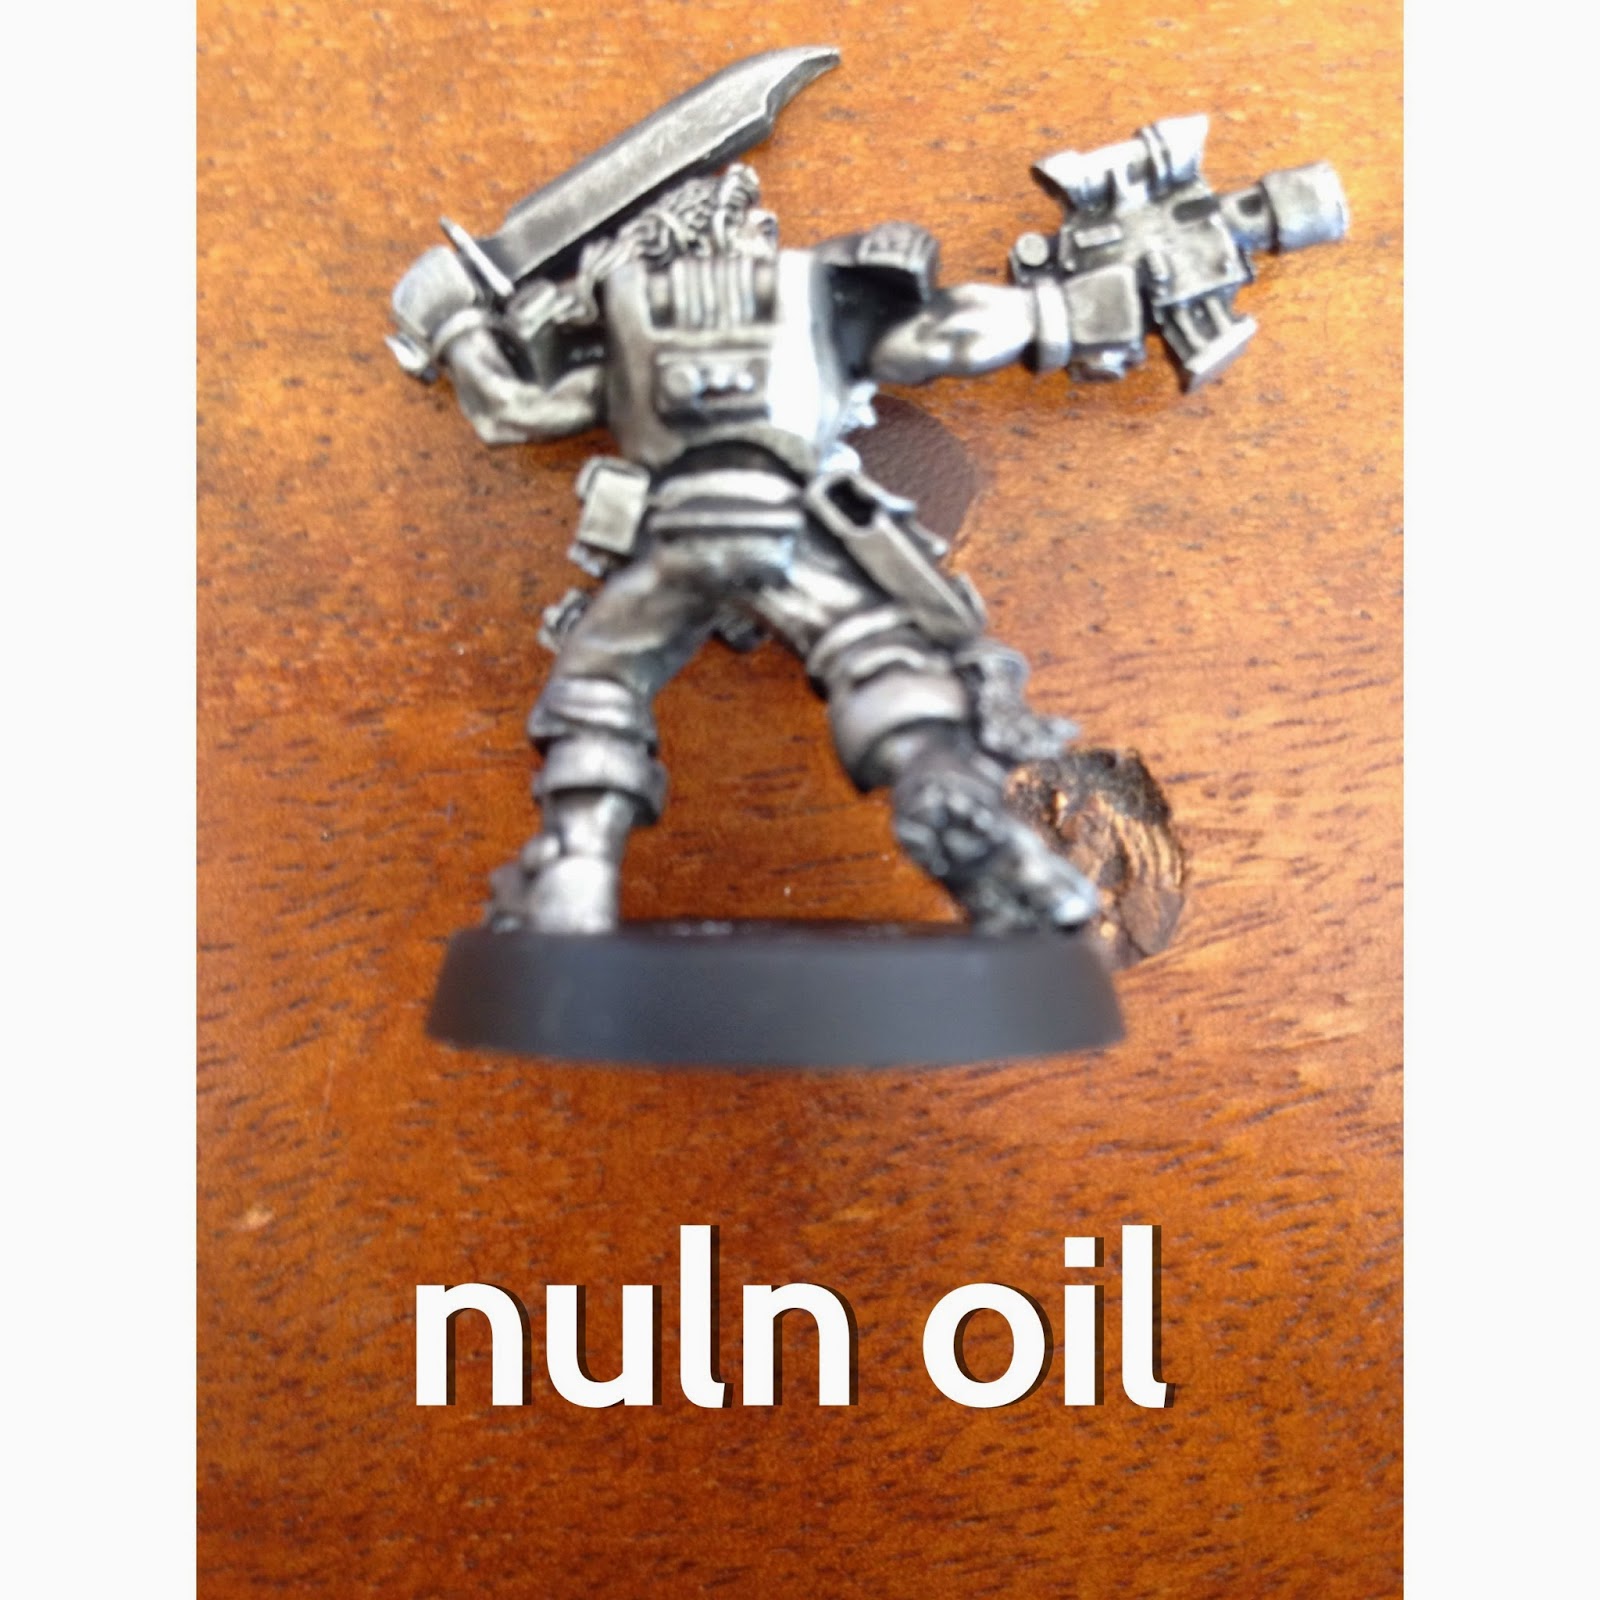
I typically use black on silver, so for these models they are based with GW's Ironbreaker.

I found this at Brookhurst Hobbies. Going to be short and sweet, don't like it. To me it feels like it has the pooling problems of an ink but the dulling properties of a wash.

Ok, Tamiya Smoke is an interesting one. Really nice outlining, totally keeps the metal shine. I like this one a lot. My only issue was the that it's gloss finish seemed a little inconsistent (some things where shinier than others). Of course this isn't really visible in the photo. But I really liked this one.

Sorry for the upside down photo (lighting). The lower half of this miniature is Winsor Newton's black ink, some line as the Nut Brown ink above. The overall effect was fine, but not inspiring. A bit closer to a wash in finish in many ways. Nuln Oil and Badab are better and easier to use for that effect.

OK, I saw this on a website as a way to make 'oily' metal. You mix Liquitex Carbon Ink with Tamiya Clear Orange in a 1:1 ratio, and I think I diluted it with water or possibly Magic Wash. If you want oily looking metal done easily, this effect was 'awesome'. I wouldn't use it for most things, but for that particular job it's great.

Ok, what product is this?!? Magic wash is made of 1/2 water, and 1/2 Future Floor Wax. You then pop a brushful of whatever paint you want into a bit of it and instant wash! The floor wax cuts down on surface tension and allows the wash to easily flow, keeping it from pooling. I've been using this stuff for over 10 years and it really is glorious. It used to be my go to way of making washes, but now I opt for more consistent pre-mixed options, but I do still use it regularly.
Note: when you mix and apply it your model will have a nice, clean smell. I promise this goes away. :) It also has a shine to it from the floor wax, but if you use a matte varnish on things you don't want to shine this is a great way to make washes.
Washes
For reference I did some tests with the current and previous lines of GW washes, both to see what they looked like compared to my tests but also compared to one another.

First up is Badab Black versus Nuln Oil. Both are great washes, that produce great effects with little chance for error, and are great for metals if you like the effect. I'm mostly spoiled towards what I started using when I first started painting, hence my search for inks. In terms of comparison, if you took the labels off the above pictures I could not tell them apart. The Badab looks a bit darker, but I think I applied it a bit thicker. Take a look at the gun in particular, since it has the same profile in both images and you'll see how close they are. Although I'd never begrudge someone preferring one over the other, I certainly have my biases as the rest of this post shows. :) Note that I missed painting the sword in the badab black shot.


Here we have Citadel Devlan Mud vs. the upstart Agrax Earthshade. Again, the difference to me is pretty mild, and most of the variance really has more to do with my application than difference in tone. My application of Agrax was definitely thicker than I normally would put it on, and then the DM application. The Devlan Mud appears slightly more reddish in these pictures, and that may be the case.


A less expensive and excellent option for washes are the Army Painter line of Soft Tone (close to Seraphim Sepia), Strong Tone (close to Agrax Earthshade), and Dark Tone (close to Nuln Oil). I tend to mildly prefer the Citadel washes, but the the Army Painter line are great alternatives that many prefer, and a better value for your dollar. Note that the red tones around the upper chest on the strong tone example are another wash that I failed to fully cover.
Tests Not Pictured
I also tested the following that I didn't bother documenting. Note that a lot of Vallejo products ended up in this category so I'll caveat that I 'love' Vallejo paints. They are high quality, good value, and unlike some people they don't discontinue their colors and leave you struggling for replacements. :) Apparently I'm just not crazy about their inks and washes.
- Liquitex Carbon Ink, but it was too blotchy and not worth showing. Surprising given how much I liked the other Liquitex inks and how well this ink worked with Tamiya Clear Orange.
- Vallejo Game Color Inks and to me they performed similarly to the current line of GW washes, so I didn't bother documenting them. If you like Vallejo, don't like GW, or prefer dropper bottles they're a good option, but I still prefer the Army Painter washes as an alternative.
- AV Acrylic Artist Ink I believe is Vallejo's artist line. I found it on Amazon and tried it out. To me it felt like a wash that didn't cover as well. It's not bad, just didn't stand out for me.
- Vallejo Model Wash Black gave a more gritty appearance that I didn't care for. These are their more realistic lines of colors, though, so maybe not surprising?
- I tested several Vallejo Model Wash colors, basically anything that said 'brown', 'earth', or 'oil' on it. I found them all to be too subtle in effect or light in color. Again, this is their more realistic line, and I'm just not a very realistic painter. :)
Conclusion
For brown inks I'm definitely going with the Liquitex stuff. Only the Winsor Newton got close to its performance, but I liked the Liquitex more. For the black inks I'm less decisive. I'll try the Tamiya Smoke, but I may just stick with Magic Wash. Hope this was useful, sorry for the length!